Binding Added - Halloween Work Completed
Yeah!! A finish!! I added the binding to both the Halloween quilt and runner completely by machine. It did not turn out bad at all. I used 2.5" double folded fabric and used a little bigger that 1/4" seam. By doing this, it seemed to line up better when sewing down the binding machine on the back. That and the fact that the stitches are black thread on black fabric :-)
Now on to new projects. Coming up... Sunbonnet Sue and Sam machine embroidery and hopefully a Christmas Tree and wreath using my accuquilt go! But first, here's a final snapshot of the finished Halloween projects.
Thanks for stopping by!
~*~Trish~*~
Halloween Quilting Completed Times Two
I was able to finish up the quilting on the Spooktacular Halloween quilt. I can't say enough how much I love these fabrics. They are so bright and cheery!! I just can't get a good photo of them. I was able to finish both the quilt and the table runner / bed runner.
Here are some photos of the finished quilting on both. All that is left is to bind the two quilts. I am going to try and save some time by using the sewing machine to add the binding. I'm determined to finish it that way. I can use all the extra time I can get!
Here's the back of the quilt. I wish you could see the spider webs better...
While I was trying to photograph the quilt, I had a guest come in and photobomb my photo. I didn't know it until I was reviewing the photos. Of course I had to catch her in the act!
I was also able to finish quilting the Halloween runner. I did need to remove the backing and piece it a little longer to fit the width and then repin it to the rollers.
Now, It's time to create the binding and add it to the quilts. I am so exciting I'll be able to enjoy them for maybe 2+ weeks. My goal is to have this done this weekend!
Thanks for stopping by!
~*~Trish~*~
Here are some photos of the finished quilting on both. All that is left is to bind the two quilts. I am going to try and save some time by using the sewing machine to add the binding. I'm determined to finish it that way. I can use all the extra time I can get!
While I was trying to photograph the quilt, I had a guest come in and photobomb my photo. I didn't know it until I was reviewing the photos. Of course I had to catch her in the act!
I was also able to finish quilting the Halloween runner. I did need to remove the backing and piece it a little longer to fit the width and then repin it to the rollers.
Now, It's time to create the binding and add it to the quilts. I am so exciting I'll be able to enjoy them for maybe 2+ weeks. My goal is to have this done this weekend!
Thanks for stopping by!
~*~Trish~*~
Halloween Quilting
I wanted spider webs for the Halloween quilt but did not have the pantograph file so I thought I would use what I had. I had a bat design that would also work well with the quilt. So, at the top of the newly loaded backing, I tested out some designs. I threw some pink scraps onto the layout and tested away. Since I really could not see the design on the pink, I placed black scraps over the pink and then redid the designs. Of course, I did not iron those black scraps so it looks a little wrinkled.
Here are the bats
Then I decided I really wanted spiderwebs. So, I purchased the pantograph design from QuiltRecipes. I tested that out as well. It was a larger 8" design and it did a lot of repeats on the webs, retracing to get from point a to point b. I was not sure that I liked that. Here's just a cutout from the stitch out of the spiderwebs.
Then I had the bright idea I would make my own pantograph. Spent several hours getting the design "just right" on screen. When I tested it out, it looked great but it was too dense. I could have resized it but at this point, I just wanted to start quilting the Halloween quilt. Here's what my pantograph sample stitch out looked like:
So, I loaded up the quilt and away I started. I ended up returning to the "Plain Spider Webs 1" panto that I purchased from QuiltRecipes. I liked that you also received a reverse design so all the random spiderwebs did not line up between the rows. Based on the first row, I'm glad I returned to the purchased pantograph.
I used a grey Superior So Fine thread for the top and white bobbin thread for the bottom of the quilt. Here's a snippet of the first row completed on the frame:
A couple more rows and then I'll be finished! Then on to the extra Halloween table runner or bed runner. I think I might make it before Halloween!
Thanks for stopping by!
~*~Trish~*~
Here are the bats
Then I decided I really wanted spiderwebs. So, I purchased the pantograph design from QuiltRecipes. I tested that out as well. It was a larger 8" design and it did a lot of repeats on the webs, retracing to get from point a to point b. I was not sure that I liked that. Here's just a cutout from the stitch out of the spiderwebs.
Then I had the bright idea I would make my own pantograph. Spent several hours getting the design "just right" on screen. When I tested it out, it looked great but it was too dense. I could have resized it but at this point, I just wanted to start quilting the Halloween quilt. Here's what my pantograph sample stitch out looked like:
So, I loaded up the quilt and away I started. I ended up returning to the "Plain Spider Webs 1" panto that I purchased from QuiltRecipes. I liked that you also received a reverse design so all the random spiderwebs did not line up between the rows. Based on the first row, I'm glad I returned to the purchased pantograph.
I used a grey Superior So Fine thread for the top and white bobbin thread for the bottom of the quilt. Here's a snippet of the first row completed on the frame:
A couple more rows and then I'll be finished! Then on to the extra Halloween table runner or bed runner. I think I might make it before Halloween!
Thanks for stopping by!
~*~Trish~*~
Spooktacular Halloween Quilt Top Completed
This morning, I finished adding the final two borders to the Halloween quilt I am working on. I decided to go with the smaller center color border. I just love how it turned out. The excess that was cut off will probably end up on the quilt backing somehow.
The quilt top is on of the larger quilts I've done. It's wider than my banister so the sides are bending in the photo, Surprisingly, you really can't tell. Here's the center border being cut off. I started with 2.5" alternating squares with black. I cut off 1.25"
Here's what the finished border ended up looking like. It was a gamble but luckily the corners turned out. Each one has some black in it to separate the meeting color blocks.
And here is the final quilt top hanging. The colors on the digital image do not do it justice. I love the colors!
I hope to have the quilt on the machine and quilted by October 1rst. That's a long shot since on work days, I just come home and pretty much crash. But, I'll keep pushing along.
Thanks for stopping by!
~*~Trish~*~
The quilt top is on of the larger quilts I've done. It's wider than my banister so the sides are bending in the photo, Surprisingly, you really can't tell. Here's the center border being cut off. I started with 2.5" alternating squares with black. I cut off 1.25"
Here's what the finished border ended up looking like. It was a gamble but luckily the corners turned out. Each one has some black in it to separate the meeting color blocks.
And here is the final quilt top hanging. The colors on the digital image do not do it justice. I love the colors!
I hope to have the quilt on the machine and quilted by October 1rst. That's a long shot since on work days, I just come home and pretty much crash. But, I'll keep pushing along.
Thanks for stopping by!
~*~Trish~*~
Debating Borders
There's something about a simple bordered quilt that I love. However, I had plans to add a pieced border to the simple Halloween quilt I am working on. I got the first solid border on the quilt and re-pinned the quilt to hang it. I then placed the pieced border beside one side and the final solid border to preview what's to come. Now that I did, I'm not so sure about the pieced border. It seemed good and it's the whole reason I purchased another charm pack. But, now that it's up, I'm not so sure.
I tried the full 2.5" pieced border with the outer solid border and then I thought maybe I'll cut the pieced border in half to make really thin rectangle pieces all around. Hmmm... I wish all decisions were this fun. So, now as I do housework <bad word>, I'm debating leaving it with a single plain border (Option A), the mini pieced border (Option B) or the full pieced outer borders (Option C). You can only see the border option in the top left part of photos b and c. I just hung the border beside the quilt to photograph.
I'm thinking if I post this and keep coming back looking at the photos, the decision will hit me. Or, when hubby comes home from work, I'll hit him with the question the minute he walks in the door!
I hope you are enjoying your Sunday!
Thanks for stopping by!
~*~Trish~*~
I tried the full 2.5" pieced border with the outer solid border and then I thought maybe I'll cut the pieced border in half to make really thin rectangle pieces all around. Hmmm... I wish all decisions were this fun. So, now as I do housework <bad word>, I'm debating leaving it with a single plain border (Option A), the mini pieced border (Option B) or the full pieced outer borders (Option C). You can only see the border option in the top left part of photos b and c. I just hung the border beside the quilt to photograph.
I'm thinking if I post this and keep coming back looking at the photos, the decision will hit me. Or, when hubby comes home from work, I'll hit him with the question the minute he walks in the door!
I hope you are enjoying your Sunday!
Thanks for stopping by!
~*~Trish~*~
Simple Halloween Quilt Center Completed
I've completed the Halloween quilt center and all I have left is the borders. My goal is to use the same squares from another charm pack and cut them into 2.5" squares and add them to the outer border between some alternating black squares. It was a little difficult lining up all the blocks when using the black borders but with some patience, it paid off. I absolutely love the colors in these charm packs! Hopefully today, I'll be able to add the borders and then move into quilting. I added 6 panel blocks from other Halloween fabric I had. I should have randomized those a little better on the quilt but there was a lot of last minute rearranging of the blocks and the orders got a little mixed up. All in all, the randomized colors didn't turn out too bad.
Thanks for stopping by!
~*~Trish~*~
2012 Breast Cancer Quilts Completed
It was a sprint to the end and I completely finished the two charity Breast Cancer Quilts at my target date. Yeah!! Just added the finishing touches and added binding to both quilts. I think I know now that the quilts that I work on that are about this size take me about four hours to finish sewing the binding on. I added a simple label with just my name and I added a hanging sleeve. I use the pre-made hanging sleeves. This saves me a little bit of time.
So now it's time to put away the pink for another year. My thoughts and prayers are with all that are affected by Breast Cancer. Keep up the faith and fight! Now to package them up and ship them out while I cross my fingers that they arrive at their intended destination!
Next up... Moda and Halloween!!!
Thanks for stopping by!
~*~Trish~*~
So now it's time to put away the pink for another year. My thoughts and prayers are with all that are affected by Breast Cancer. Keep up the faith and fight! Now to package them up and ship them out while I cross my fingers that they arrive at their intended destination!
Next up... Moda and Halloween!!!
Thanks for stopping by!
~*~Trish~*~
Two Quilts Quilted
Over the last two weeks I've been running the quilting machine to finish up the 2012 charity quilts. I was able to finish both the quilts! Now, all I have left is to add the binding and sew it down. Also, add a hanging sleeve. I'm hoping to be completed and have these shipped out by middle of September!
Happy Labor Day to all!
Here's a close up of the quilting. The photo makes it look like it detracts from the writing on the blocks but it does not. You can reads all the messages without issues.
Thanks for stopping by!
~*~Trish~*~
Happy Labor Day to all!
Here's a close up of the quilting. The photo makes it look like it detracts from the writing on the blocks but it does not. You can reads all the messages without issues.
Thanks for stopping by!
~*~Trish~*~
Getting Ready for Quilting
Since both quilt tops are completed, it's time to get ready for quilting. I wish I could remember where the ribbon quilt pattern came from but I honestly don't remember. I squared up the quilt top. Before loading it, I decided to practice the pattern on some ruined white (now yellowed) fabric piece I had.
Even though the software can figure out how many repetitions I should use for the pattern on my quilt, I tend to like to rely on my own figuring out on scratch paper. I'm glad I practice it first since you can see my spacing was way off on the spacing between the rows 1 and 2 at first. So, I tried again and then I was happy with the intertwined designs on rows 2 and 3.
Now it's time to load the first quilt and get going. I'll post pictures of the finished product hopefully by the end of the weekend! Stay Tuned!
Thanks for stopping by!
~*~Trish~*~
Simple White Border
The last part (I thought) that I needed to do on the second charity quilt was to add a border to it. I thought of all different options. The last idea I had was to keep it simple. One single border.. But what color should I use? I settled on a white border. The same white fabric that is in the center of the quilt. Once the pink binding is added, the whole border/binding combo will match the quilt center. Next up, a little practicing for quilting and then it's time to start loading the quilt tops to be quilted!
I'm not crazy about how you can see through the white fabric. Because of this, I went out and purchased the warm and white batting. The warm and natural I usually use made the white have a beige tint to it. Hopefully the warm and white will work just as well.
Additionally, I need to embroider a few more words on the completed quilt top. This will be a big challenge since it's already assembled. I honestly missed mentioning the guys as well. I should put Men and/or Brothers somewhere on the quilt. But where?? Maybe in the pink around the white center. This will be interesting. I need 2 additional words to add with the words Brothers and Fathers. Here are the other words that I already used on the quilt:
Faith / Believe / Sisters / Fight / Family / Strong / Courage / Friends / Cure / Hope / Support / Brave / Love / Wish / Inspire and Mothers.
Thanks for stopping by!
~*~Trish~*~
I'm not crazy about how you can see through the white fabric. Because of this, I went out and purchased the warm and white batting. The warm and natural I usually use made the white have a beige tint to it. Hopefully the warm and white will work just as well.
Additionally, I need to embroider a few more words on the completed quilt top. This will be a big challenge since it's already assembled. I honestly missed mentioning the guys as well. I should put Men and/or Brothers somewhere on the quilt. But where?? Maybe in the pink around the white center. This will be interesting. I need 2 additional words to add with the words Brothers and Fathers. Here are the other words that I already used on the quilt:
Faith / Believe / Sisters / Fight / Family / Strong / Courage / Friends / Cure / Hope / Support / Brave / Love / Wish / Inspire and Mothers.
Thanks for stopping by!
~*~Trish~*~
Second Quilt Center assembled
I only have the border to complete on the second Ford Cares Breast Cancer quilt. I was able to assemble the center part of the top. I like how all the extra embroidery blocks turned out. Even with the different fonts that I used. To me, the Cure and Wish words are larger than the rest but I'm going with that it was on purpose. We all wish for a cure on this disease.
Here's the center part. I plan on adding a thin white border and a pink exterior border around the whole thing. I didn't get a chance to iron the top yet. Hope everyone is having a great weekend!
Thanks for stopping by!
~*~Trish~*~
Here's the center part. I plan on adding a thin white border and a pink exterior border around the whole thing. I didn't get a chance to iron the top yet. Hope everyone is having a great weekend!
Thanks for stopping by!
~*~Trish~*~
Many Wishes
I found that I needed to redo a few words in another font. I just could not keep the funky looking I on the first try. The font's don't match but I like them better than before. It took me a few tries to get the right size of "wish" for the quilt. I have a few extra blocks so I may be making a pillow too. Here's my many wishes. It took me a while to find a font with a normal looking I
I finished up all the supportive words to add to the second charity quilt. Here's the second batch of words and then all the words line up.
Thanks for stopping by!
~*~Trish~*~
I finished up all the supportive words to add to the second charity quilt. Here's the second batch of words and then all the words line up.
Next stop will be the quilt layout. But time to go and enjoy some other items for the weekend. Stay tuned for the quilt layout...
Thanks for stopping by!
~*~Trish~*~
The I's have it
In between the storms today, I was able to work on the extra blocks that I wanted to add to the second charity Breast Cancer Quilt I am starting to assemble. I had blank blocks added to make it to the 10 blocks by 12 layout size I wanted, but could not keep them blank. So, off to the embroidery machine I went. I was able to get these completed pretty quick. They all needed to be light backgrounds to work with the layout I was thinking about.
I'm pretty much happy with how they turned out except two. Why is it that every embroidery font that comes with a sewing machine has a funky looking I? I mean the capital I's always look like T's to me. What gives? Ugh... What do you think? I wanted it in all caps since I'll have four blocks in caps and four in sentence case.
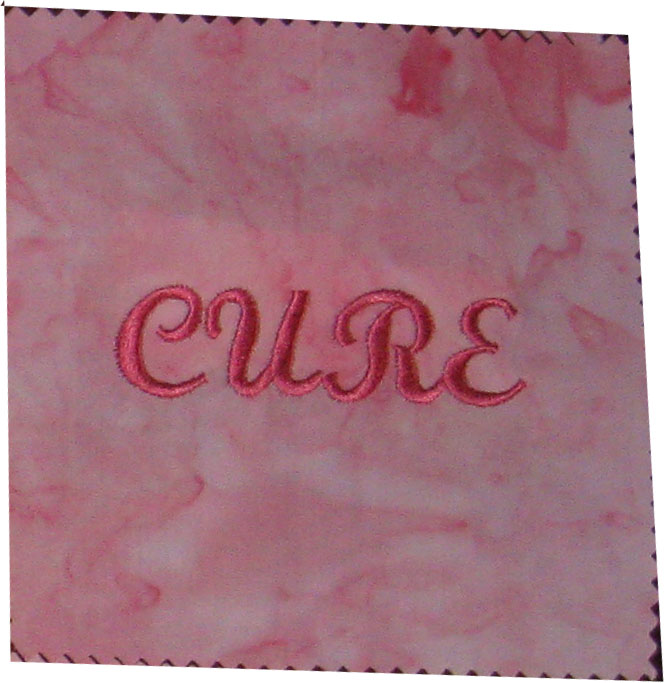
While I am being picky, I'm thinking my capital C looks almost like an E. Instead of CURE, my eyes are seeing EURE. Maybe it's time to push up that eye doctor visit. I may be off to look for new fonts with basic I's and C's to redo these two blocks. I wanted to keep them all in the same font, but, not sure I will.
Hope all is going well with you this weekend!
Thanks for stopping by!
~*~Trish~*~
I'm pretty much happy with how they turned out except two. Why is it that every embroidery font that comes with a sewing machine has a funky looking I? I mean the capital I's always look like T's to me. What gives? Ugh... What do you think? I wanted it in all caps since I'll have four blocks in caps and four in sentence case.
While I am being picky, I'm thinking my capital C looks almost like an E. Instead of CURE, my eyes are seeing EURE. Maybe it's time to push up that eye doctor visit. I may be off to look for new fonts with basic I's and C's to redo these two blocks. I wanted to keep them all in the same font, but, not sure I will.
Hope all is going well with you this weekend!
Thanks for stopping by!
~*~Trish~*~
Butterfly Babies
Every year we anxiously await the arrival of the monarch butterflies to our butterfly garden in the back of the yard. Over the last week we have seen a few fluttering around the flowers and we know what that means. Tucked underneath those leaves are scattered micro dots of butterfly babies. I know technically they are caterpillars but to me they'll be the butterfly babies.
Most we leave on the leaves to try and mature naturally but others find themselves brought in and pampered in a safe environment to mature until it's time for release! Look closely at the leaves photo. The tiny specs of white are eggs that will hatch into tinee tiny caterpillars.
Thanks for stopping by!
~*~Trish~*~
Most we leave on the leaves to try and mature naturally but others find themselves brought in and pampered in a safe environment to mature until it's time for release! Look closely at the leaves photo. The tiny specs of white are eggs that will hatch into tinee tiny caterpillars.
Thanks for stopping by!
~*~Trish~*~
First Quilt Top Completed
I finished the first charity quilt for the breast cancer campaign in October. Everything went well for the quilt until it was completely done. One of the corners is a smidgen off. By smidgen, it's more like almost a 1/4 inch. Driving me crazy. But, most of the other blocks in the row match up so I'm not too sure how I would go about fixing this unless I add more to one column of blocks to push the white strip to the left a little to line up. Or, I can reduce the size of the white strip a smidgen maybe.
I forgot how difficult it was to add a strip and then continue to line up the blocks on either side of that strip. If you have any suggestions, please let me know. Here's the problem corner and then the full quilt top. I'm also a little disappointed with the white fabric. It's a little see through. I'm concerned that when I put the yellowish natural batting behind it, the quilt top will lose it's crisp white strips.
This week, time to figure out the layout for the second quilt top and get moving on that. Then, we are in the waiting game again for some tests completed on Friday for DH. After 2.5 years of remission, it's still a roller coaster ride. Keep your fingers crossed the bone marrow test comes back just "naturally" low.
Thanks for stopping by!
~*~Trish~*~
I forgot how difficult it was to add a strip and then continue to line up the blocks on either side of that strip. If you have any suggestions, please let me know. Here's the problem corner and then the full quilt top. I'm also a little disappointed with the white fabric. It's a little see through. I'm concerned that when I put the yellowish natural batting behind it, the quilt top will lose it's crisp white strips.
![]() |
| 2012 Quilt Top - Needs a little ironing. |
Thanks for stopping by!
~*~Trish~*~
Subscribe to:
Posts (Atom)